Showing posts with label Upstairs Bathroom. Show all posts

Wednesday, May 29, 2013

Bamboo bathroom blinds

I've been pondering for months about what to do for the window in the bathroom. I've seen many tutorials out there with mini blinds. I just didn't feel confident in the way they would hold up. Then I saw Young House Love's bamboo blinds that they added to their office and I fell in love!


So we decided to go and pick up these blinds from home depot. We installed them and think it adds so much warmth to the space. It will also complement the wood countertops we plan on doing for the vanity.


We're still working on the rest of the bathroom and don't want to reveal too much so we're going piece by piece. Here's the rest of our checklist for the bathroom:

- Buy new shower curtain
- Install new shower tile
- Replace shower rod
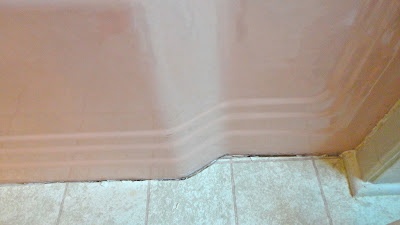
- Refinish old pink tub
- Replace shower head 
- Install new floor tile
- Replace/ refinish dated vanity
- Replace sink
- Frame out mirror
- Replace vanity lighting
- Add bamboo blinds
- Install vent fan
- Paint/prime walls 
- Paint ceiling
- Replace trim 
- Install new countertops
- Create custom drawer pull-outs for linen cabinets
- Install new cabinet hardware
- Paint cabinet doors
- Hang artwork
- Replace shower hardware
- Replace faucet 
- Remove magazine rack
- Recaulk bathtub
- Install crown molding


Pin It Now!

Monday, May 27, 2013

Finding the perfect light gray paint

For months we have been looking for inspiration for our upstairs bathroom. We intend for this bathroom to be the one used by guests so we want it to look super nice! The hallways are dark gray so we knew that we wanted to choose something lighter and brighter for the bathroom. I wanted it to feel clean and serene. We chose to stick with a light gray but choosing the right one proved to be a huge task. Not all gray paints are the same. I wanted a "true" gray. I searched the internet and finally settled on Nimbus Cloud by Martha Stewart.


The lighting in the bathroom isn't great and my camera is less than ideal but the bottom picture more accurately depicts the paint color. Sometimes it has a greenish blue tint but I think it's perfect! I love it so much I might use it in a few other rooms. 

Pin It Now!

Monday, April 29, 2013

Farewell Cranberry Paint

So our last post was how we decided to tackle the ceiling. Today we finished painting and priming over the cranberry colored paint. Wow what a difference some paint can make let me tell you. The previous owners had painted over the black glossy tiles and instead of us deciding to do a demo of the tiles, we decided to prime and paint over the existing ones. The result was great…check it out!

We used:
-Roller
-Paint brush
-Behr Paint and Primer in One


This was after one coat..


 and finally three coats...


Here's our updated to do list for the bathroom:
- Buy new shower curtain
- Install new shower tile
- Replace shower rod
- Refinish old pink tub
- Replace shower head 
- Install new floor tile
- Replace/ refinish dated vanity
- Replace sink
- Frame out mirror
- Replace vanity lighting
- Make custom roman blinds/ add bamboo blinds
- Install vent fan
- Paint/prime walls 
- Paint ceiling
- Replace trim and molding 
- Install new countertops
- Create custom drawer pull-outs for linen cabinets
- Install new cabinet hardware
- Update cabinet doors
- Hang artwork
- Replace bathroom hardware
- Replace faucet 
- Remove magazine rack
- Recaulk bathtub
- Install crown molding

Next we plan on painting the upper yellow portion of the walls a light grey color….more to come!

Pin It Now!

Friday, February 22, 2013

Re-caulking the bathtub

We literally have done nothing in regards to the bathroom since we moved in. We plan on refinishing the bathtub and tiling but for now I want to focus on other areas. One thing that had been driving me absolutely crazy was the moldy caulk. It was absolutely gross! So we decided to replace it….I mean how hard could it possibly be? Let's just say Jared had the f-bombs flying….

You will need:
-Box Cutter or we used this caulk remover tool that worked really well
-Toothbrush
-Bleach
-Rag or paper towels
-Caulk
-Painter's tape


This picture was taken when we first moved in…the house came with the grungy shower curtain which I can assure you was promptly taken down! 

The first step was to remove all of the caulk. This was the most painful process because we had to remove two old layers of caulk.

 The next step is to clean the areas you are going to put the new caulk. Use a toothbrush with bleach to prevent mold from growing behind the new caulk. Then dry the area thoroughly.

 Then we outlined the areas we needed to caulk with painter's tape. This step will make your life soooo much easier, trust me!  

 Lastly, use your finger to smooth out the caulk and remove the painter's tape before it dries. 


There you have it, this is how we re-caulked our bathtub! Hopefully it'll last us until we decide to refinish the bathroom! 


Pin It Now!

Saturday, June 2, 2012

Upstairs Bathroom Checklist


- Buy new shower curtain
- Install new shower tile
- Replace shower rod
- Refinish old pink tub
- Replace shower head 
- Install new floor tile
- Replace/ refinish dated vanity
- Replace sink
- Frame out mirror
- Replace vanity lighting
- Make custom roman blinds/ add bamboo blinds
- Install vent fan
- Paint/prime walls 
- Paint ceiling
- Replace trim and molding 
- Install new countertops
- Create custom drawer pull-outs for linen cabinets
- Install new cabinet hardware
- Update cabinet doors
- Hang artwork
- Replace bathroom hardware
- Replace faucet 
- Remove magazine rack
- Recaulk bathtub
- Install crown molding


Pin It Now!